


Developing using Sample Applications
As explained in previous chapter, sample Java client with source code is provided to help the community rapidly develop applications that use Aadhaar authentication. This application is written in Java and demonstrates various features of Aadhaar authentication. This application is provided on an "AS-IS" basis and should not be considered as a supported, production strength software. This chapter covers details about downloading and setting up development environment.
Sample Java application (both binary and source code zip files) to test Aadhaar authentication can be downloaded from here.
Setting up Development Environment
When you download the source distribution using downlink above, you get "auth-client-source-1.5.zip". Follow steps below to setup the client as a development environment. These directions are for Windows OS. If you are using Linux or other OS, you may make appropriate modification to the instructions below.
You need
Java 1.6.20 or above, Apache Maven 2.2.1 or above, and Eclipse Java IDE installed on your computerto setup environment based on this page.
You can use the source code and setup environment if you want it in other IDEs and build environments.
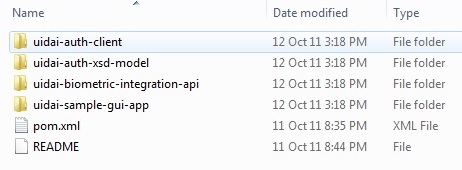
Unzip "auth-client-source-1.5.zip" into a directory. You should now see a directory named "auth-client-source-1.5" there
Navigate to "auth-client-source-1.5" directory. You should see the following listing.
Within "Command Prompt", change directory ("cd") to "auth-client-source-1.5"
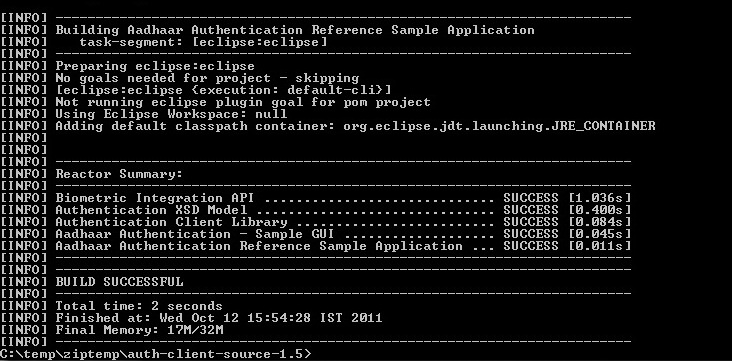
Run "mvn eclipse:eclipse" command. If "Maven\bin" is not in path, please add it. Otherwise "mvn" command will not run.
You should see "Build Successful" message like below.
Launch Eclipse and create a new workspace (or use current workspace if you prefer)
Choose "File->Import" menu. This lanuches an import dialog.
Choose "Existing Projects into Workspace" option and click "Next"
Click "Browse" button next to "Select Root Directory"
Navigate to "auth-client-source-1.5" and select the directory
This will list 4 projects - "uidai-auth-client", "uidai-auth-xsd-model", "uidai-biometric-integration-api", and "uidai-sample-gui-app"
Make sure all projects are selected. See screen below.

Click "Finish" to import all 4 projects into workspace
If you have project that provides biometric integration API implementation, you will have to add it to the class path of the "uidai-sample-gui-app" project.Also, update the value of field, biometricAPIImplementationClass, in the SampleClientMainFrame.java to the value of the class that implements the API.
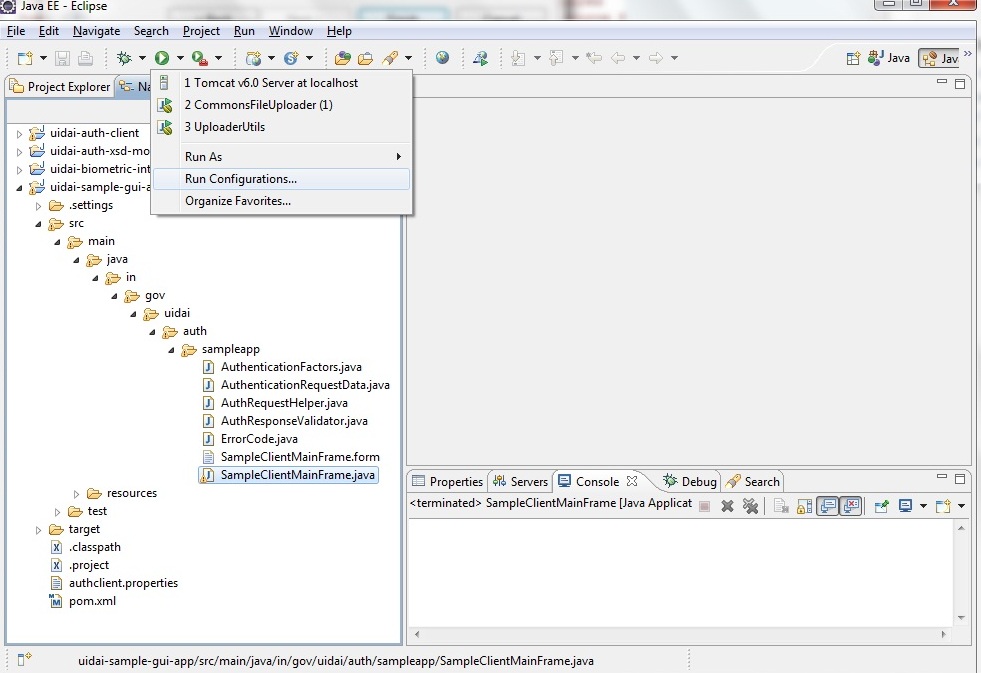
Select "SampleClientMainFrame.java" under project "uidai-sample-gui-app" (src/main/java/in/gov/uidai/auth/sampleapp folder) and choose "Run->Run COnfigurations" menu or click "Run" icon on toolbar and choose "Run COnfigurations".
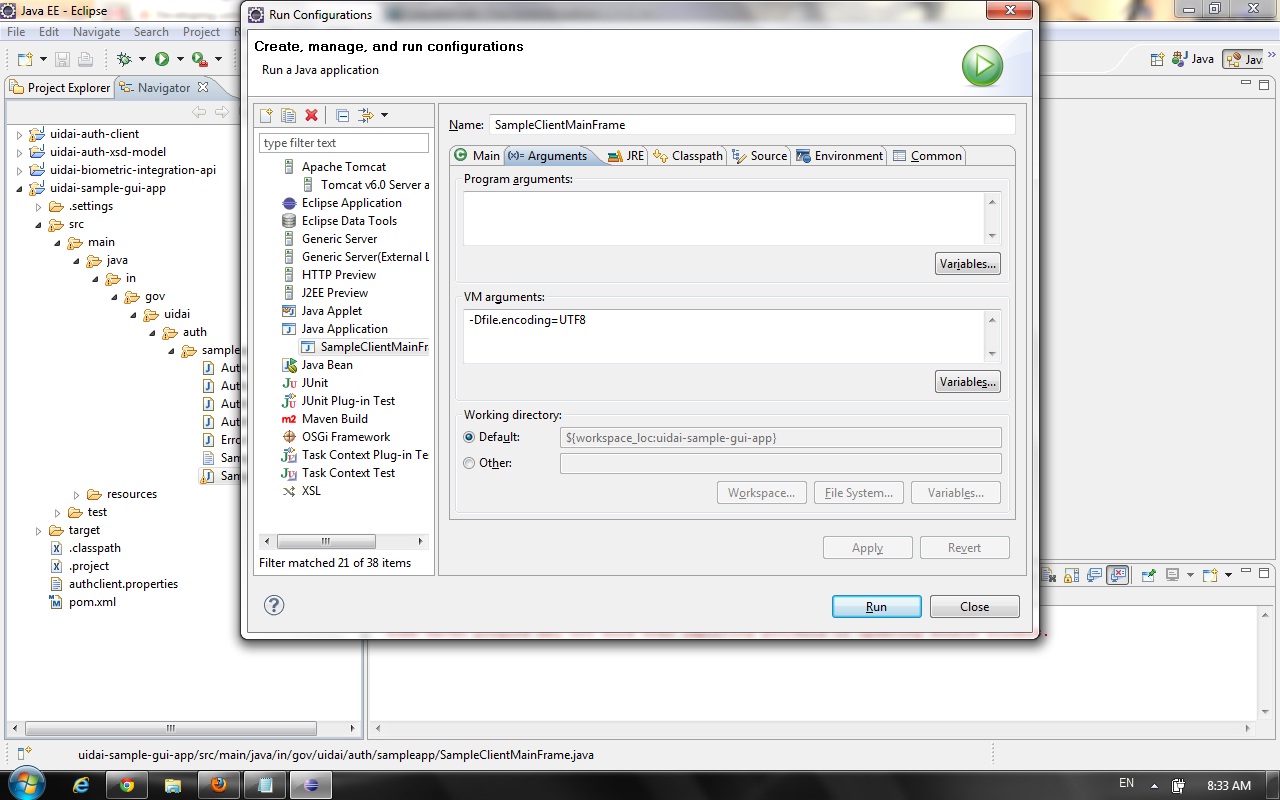
Click "New Launch Configuration" icon on left top corner within the dialog. This created a new default run configuration for the sample application.
In order to use Indian name matching, it is required that the java apps run in UTF-8 character encoding mode. For that, in Java, following VM arguments has to be passed "-Dfile.encoding=UTF8". Within "Run Configurations" doalog, add this to VM arguments
Click "Run" button on the bottom right within the "Run Configuration" dialog to run the application. you should see the sample application GUI window.
Choose "Edit->Preferences" menu option and ensure you choose appropriate path for public key file and keystore file (they are available under "auth-client-source-1.5\uidai-auth-client\src\main\resources" folder. Ensure license key, AUA code, Sub AUA code are as listed under "Testing Data" page
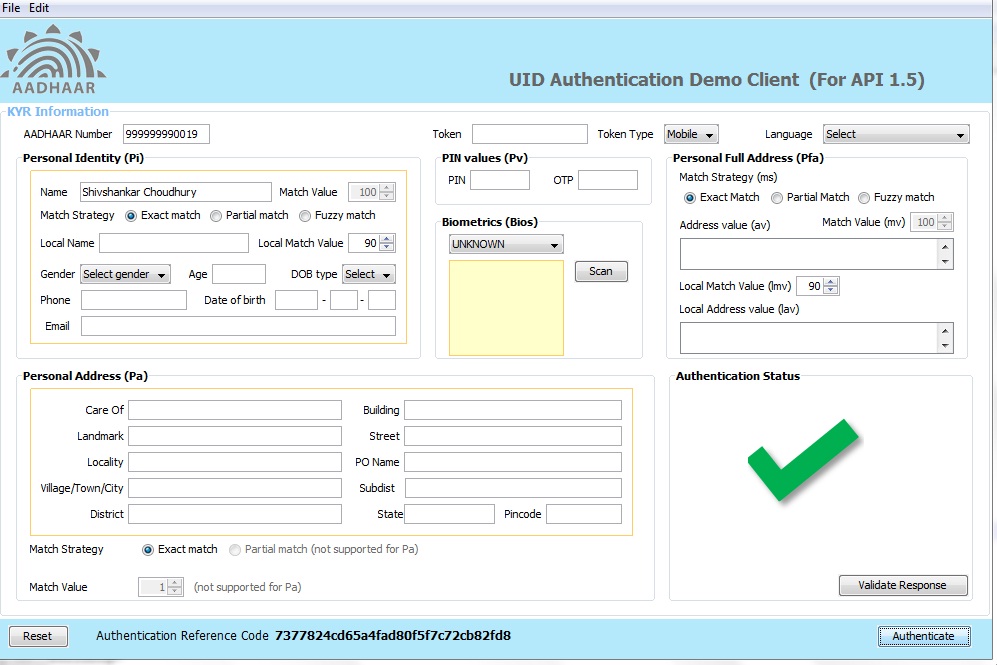
Enter "999999990019" in "Aadhaar Number" field and "Shivshankar Choudhury" in the "Name" field. Additional data is available on "Testing Data" page.
Click "Authenticate" button at the bottom right
You should see a green tick mark within the "Authentication Status" field. See the following screen
If you have issues, first ensure you have followed all steps correctly. If you face network or connection errors, please make sure your Internet connection is working well. If test server (auth.uidai.gov.in) is down or not reachable, try after some time.
If nothing works (!), please write to the Discussion Forum Page

 play_circle_outline
 play_circle_outline
 play_circle_outline
 play_circle_outline
 play_circle_outline

